There is a socket on the end of the impact wrench that you use to attach different-sized bolts.
Suppose you’re working on a project that requires a lot of torque. An impact wrench is a suitable tool for the job. But if you don’t have a socket attached to your impact wrench, what do you do? Here’s a quick guide on how to put a socket on an impact wrench.
First, ensure that your socket is compatible with the impact wrench. Before you start using your impact wrench, make sure you check the socket size. Most impact wrenches have a 1/2-inch or 3/8-inch square drive.
Next, locate the anvil on the impact wrench. This is the part of the tool that the socket will be attached to. On most impact wrenches, the anvil is located on the side of the tool opposite the handle.
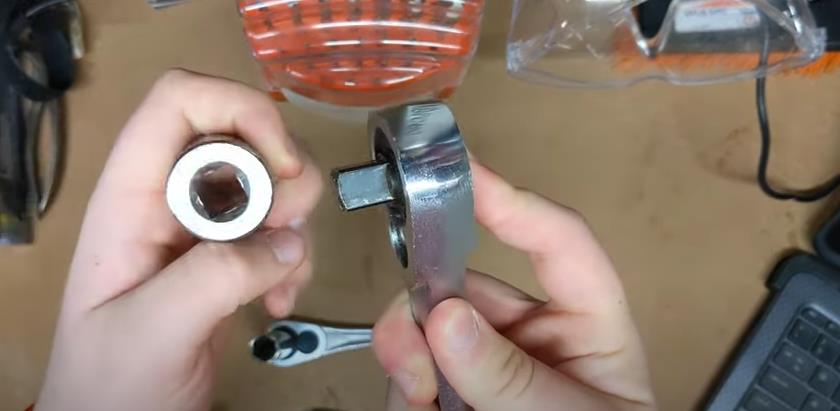
Take the socket and align it with the anvil. You’ll see that the socket has a hole in the centre that is the same size as the anvil. It would help if you pushed the socket onto the anvil until it is fully seated.
Then you’re ready to start using your impact wrench with the socket attached. Be sure to follow all safety precautions when using this powerful tool.
You can learn more about it by continuing to read.
Let’s start.
How To Put A Socket On An Impact Wrench
You must be careful and precise to put a socket on an impact wrench.
Follow these steps to put a socket on an impact wrench:
- Locate the socket retainer, also known as the anvil, on the end of the impact wrench. This is where the socket will attach to the tool.
- Align the socket with the anvil, ensuring that the square drive matches the square drive on the anvil.
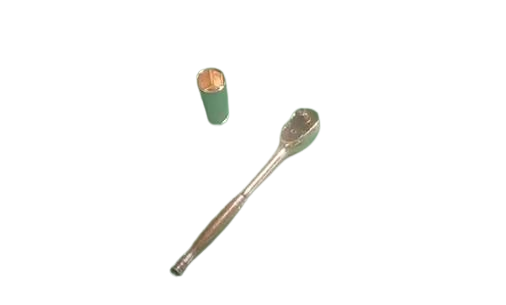
- The socket should snap into place as soon as it is pushed onto the anvil. You should hear a clicking sound when the socket is securely attached to the impact wrench.
- Before using the impact wrench, ensure that the socket is securely attached to the anvil and that the drive square is fully seated.
- When you’re done using the impact wrench, remove the socket from the anvil by pressing the release button, usually located on the side or back of the anvil, and pulling the socket off the anvil.
Taking these steps will ensure you don’t miss anything and that your impact wrench and all of its parts work safely.
Note: Some impact wrenches require pulling out a ring or a pin before adding the socket. And after you are done using it. To secure the socket, replace the ring or pin.
What Sockets Go on Impact Wrench?
Impact wrenches are available in cordless, pneumatic, and electric models.
An impact wrench is a power tool that lets you get a lot of torque with little work. It is used in various tasks, including automotive repair, construction, and manufacturing.
Each type of impact wrench has its advantages and disadvantages. Let’s look at the main three impact wrenches.
Cordless Impact Wrenches
Cordless impact wrenches are the most portable and versatile type of impact wrench. It is battery-powered, so you won’t need an electrical outlet to use it anywhere.
Cordless impact wrenches are available in both 12-volt and 20-volt models. The 12-volt models are best suited for light-duty applications, while the 20-volt models have more power and torque for heavy-duty applications.
Pneumatic impact
By using compressed air, pneumatic impact wrenches work. They are often used in industrial settings because they can generate a lot of torque (up to 1,000 ft-lbs).
Pneumatic impact wrenches typically have two sockets: pin detent or friction ring.
Pin detent sockets have a small hole in the centre that holds the socket onto the drive shaft of the wrench while you’re working.
Friction ring sockets have a series of grooves inside that grip the drive shaft when applying pressure.
Electric Impact Wrenches
Electric impact wrenches are plugged into an electrical outlet to operate. They offer portability since they don’t require an air compressor like pneumatic wrenches.
Electric impact wrenches come in both 120-volt and 240-volt models; however, most household outlets are only rated for 120 volts, so you’ll need a special adapter to use a 240-volt model.
What Is The Recommended Torque Setting For A 3/8-inch Impact Wrench?
The recommended torque setting for a 3/8-inch impact wrench is 80 ft-lbs.
A few factors go into finding the recommended torque setting for a 3/8-inch impact wrench.
Anvil
The first is the size of the anvil. The bigger the anvil, the higher the torque that can be applied.
The Rotational Speed Of The Wrench
The wrench’s recommended torque setting will be lower with an air compressor than with a battery.
Your specific impact wrench’s owner’s manual will provide you with the recommended torque setting. Look up the recommended torque settings in the table once you have the manual. For best results, use the wrench set that corresponds to yours.
Consider an impact wrench with a 3/8-inch anvil and 3,000 rpm, and a 3/8-inch impact. When using an air compressor to power the wrench, the recommended torque setting is 60 ft-lbs. The recommended torque setting for a battery-powered wrench is 90 ft-lbs.
In general, it’s better using a lower torque setting than a higher one. When in doubt, start at the lowest setting and work your way up.
How Do You Properly Attach A Socket To An Impact Wrench?
To attach a socket to an impact wrench, you will need to line up the square drive of the socket with the anvil of the impact wrench and then push the socket onto the anvil until it clicks into place.
If you’re planning on doing any serious auto work, an impact wrench is an invaluable tool in your arsenal. Impact wrenches are used to loosen and tighten lug nuts on tires. And they quickly work on a task that would otherwise be very difficult.
To properly attach a socket to an impact wrench, you’ll need first to make sure that the socket is compatible with the wrench. Impact wrenches come in two different sizes, 1/2 inch and 3/4 inch. You’ll need to ensure that the socket you’re using is the same size as the wrench.
Once you’ve verified that the socket is the correct size, It’s time to attach it to the wrench. The first thing you’ll need to do is remove the anvil from the wrench. The anvil is the part of the wrench that actually makes contact with the lug nut.
To remove the anvil, simply pull it out of the wrench. Once the anvil is removed, you can thread the socket onto the wrench. Ensure that the socket is threaded on, and then replace the anvil.
Now that the socket is properly attached to the wrench, you can start loosening and tightening lug nuts. Before using the wrench, ensure the socket is secure, or both could be damaged.
I hope you can understand how to put a socket on an impact wrench.
Final Thought
Putting a socket on an impact wrench can be a tricky task. But with the right tools and some practice, it can be done quickly and easily. Make sure you have the correct size socket for your impact wrench by checking the specifications printed on the tool itself.
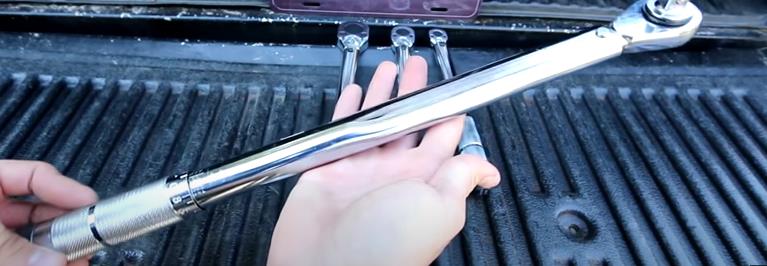
Next, ensure you have the right tools to remove your bolts: a torque wrench and breaker bar. Finally, practice putting the socket on the bolt until you feel confident in doing it correctly in real-life settings.
Now you know the truth all about how to put a socket on an impact wrench. So I hope you’ll be able to do it easily in any situation.
If you have any questions or comments about this process, leave them below, and I’ll be happy to help.
7 thoughts on “How To Put A Socket On An Impact Wrench: Know Best Way”
Comments are closed.