Keep your cordless hedge trimmer’s blades clean and lubricate them periodically to maintain sharpness and durability. Regularly check and replace worn teeth to ensure optimal performance.
Maintaining cordless hedge trimmers requires attention to their blades and teeth to ensure they remain effective and last long. These garden tools help keep your hedges and bushes neat, but without proper care, they can quickly become blunt or damaged.
Keeping the blades sharp not only enhances the efficiency of your trimming tasks but also helps prolong the lifespan of your trimmer. This guide will provide you with straightforward tips to keep your cordless hedge trimmer cutting smoothly. Consistent and proper maintenance not only saves you time and effort but also spares you the cost of frequent replacements. With the right care, your cordless hedge trimmer will be a reliable tool for your gardening needs season after season.
Importance Of Blade Care
Keeping your cordless hedge trimmer’s blades and teeth in pristine condition isn’t just a matter of meticulousness—it’s a critical aspect of tool maintenance. Sharp and clean blades are essential for clean cuts, which keep your hedges healthy and your garden looking manicured. In this section, we’ll delve into why blade care is crucial for your trimmer’s performance, longevity, and safety.
Preserving Tool Efficiency
A hedge trimmer with well-maintained blades significantly enhances cutting efficiency. Clean and sharp blades slice through branches with ease, reducing the time and effort required to shape your hedges. Ensuring optimal performance means less strain on the motor, which can also help conserve battery life. Implementing a routine blade care regimen keeps your trimmer running smoothly and efficiently.
Extending Lifespan Of Hedge Trimmer
Regular blade maintenance not only ensures top performance but also prolongs the overall life of your cordless hedge trimmer. Blades that are free of sap, debris, and rust are less likely to suffer from premature wear or breakage. A simple schedule for cleaning and sharpening can mean the difference between replacing your trimmer every few years and enjoying a robust tool for much longer.
Preventing Trimmer Malfunctions
Neglecting blade care can lead to a variety of trimmer malfunctions. Dull or dirty blades might cause the trimmer to jam or the motor to overheat, which can be costly to repair. Moreover, a well-maintained blade system can prevent unexpected stalling during operation, ensuring a safe environment for you to work in. Prioritize blade care to avoid the inconvenience and danger of malfunctioning equipment.
Routine Cleaning Tips
Keeping your cordless hedge trimmer in top shape is crucial for both its performance and longevity. Routine cleaning of the blades and teeth is a maintenance must that stems far beyond mere aesthetics. Regular attention ensures maximum cutting efficiency and helps to prevent malfunctions and premature wear. Follow these useful tips to maintain your hedge trimmer’s blades and teeth, ensuring they remain sharp and rust-free.
Removing Debris After Each Use
After each use, it’s important to remove any debris that may have become lodged between the blades or teeth. Organic material left on the blades can decompose, causing the metal to corrode and leading to dulled edges. To avoid this:
- Turn off and disconnect the hedge trimmer.
- Use a soft brush or compressed air to gently rid the spaces between the teeth of debris.
- Inspect for stuck branches or leaves and remove them manually if necessary.
- Finish by wiping the blades down with a clean, dry cloth to remove residual dust.
Correct Cleaning Solutions And Tools
Use only approved cleaning solutions and tools to clean the blades and teeth of your hedge trimmer. Harsh chemicals or abrasive materials can damage the metal and protective coatings. Stick to the following for a safe clean:
- Mild detergent or soap diluted in water is usually sufficient.
- Soft cloth or sponge to apply the solution and avoid scratching the blades.
- Rinse with clean water to remove any soap residue.
- Non-abrasive brush for stubborn grime.
Drying Blades Properly To Prevent Rust
Properly drying the blades after cleaning is essential to prevent rust and corrosion. Even if the hedge trimmer is stored indoors, moisture can lead to oxidation of the metal parts. To properly dry your hedge trimmer:
- Thoroughly wipe down the blades with a clean, dry cloth to remove excess water.
- Allow the hedge trimmer to air dry in a well-ventilated area before storing.
- Using a rust-inhibiting spray on the blades can provide extra protection, especially in humid environments.
Signs Blades Need Sharpening
Maintaining your cordless hedge trimmer is pivotal to preserving its efficiency and prolonging its lifespan. Knowing Signs Blades Need Sharpening is the first step in upholding optimal performance. Dull blades can damage your hedges, make your work more labor-intensive, and lead to excessive wear on the trimmer. Below are the distinct indicators that suggest it’s time to sharpen those blades.
Difficulty In Cutting
If you’re applying more pressure than usual and finding it difficult to slice through the branches, your blades are likely to be dull. When blades lose their edge, they require extra force to cut, which not only compromises the cut quality but also puts additional strain on the trimmer’s motor. Sharpening the blades restores their cutting efficiency, significantly reducing the effort needed to maintain your garden.
Torn Foliage Instead Of Clean Cuts
Clean cuts are synonymous with a well-maintained trimmer. Observing the nature of the cuts is a straightforward method to diagnose blade dullness. Blades in prime condition leave behind a sharp, clean cut whereas dull blades tend to tear foliage, resulting in ragged edges. This not only affects the hedge’s appearance but also its health, as torn foliage can make the plants more susceptible to disease.
Unusual Noises During Operation
A change in sound can be an audible clue that your hedge trimmer blades require attention. Listen for unusual grinding, squeaking, or chattering noises during operation. Such sounds could indicate blades are struggling to perform their job. The trimmed foliage causes friction against the dull blades, generating these noises. Sharpening your hedge trimmer’s blades will help in reducing these unusual sounds and ensure a quieter, smoother operation.
Step-by-step Sharpening Guide
Welcome to our Step-by-Step Sharpening Guide, which will walk you through maintaining the pristine condition of your cordless hedge trimmer’s blades and teeth. Sharp blades are pivotal for clean cuts and the overall longevity of your hedge trimmer. In just a few straightforward steps, with the right tools and techniques, you can ensure your trimmer is in top shape and your hedges are neatly trimmed.
Safety Precautions Before Starting
The safety of the operator is paramount when sharpening the blades and teeth of any cutting tool. Before you start the sharpening process, follow these essential steps:
- Disconnect the trimmer from its power source to prevent accidental activation.
- Wear protective gloves to guard your hands against potential cuts.
- Use eye protection to shield your eyes from metal filings.
- Work in a well-lit area to ensure clear visibility of the trimmer teeth.
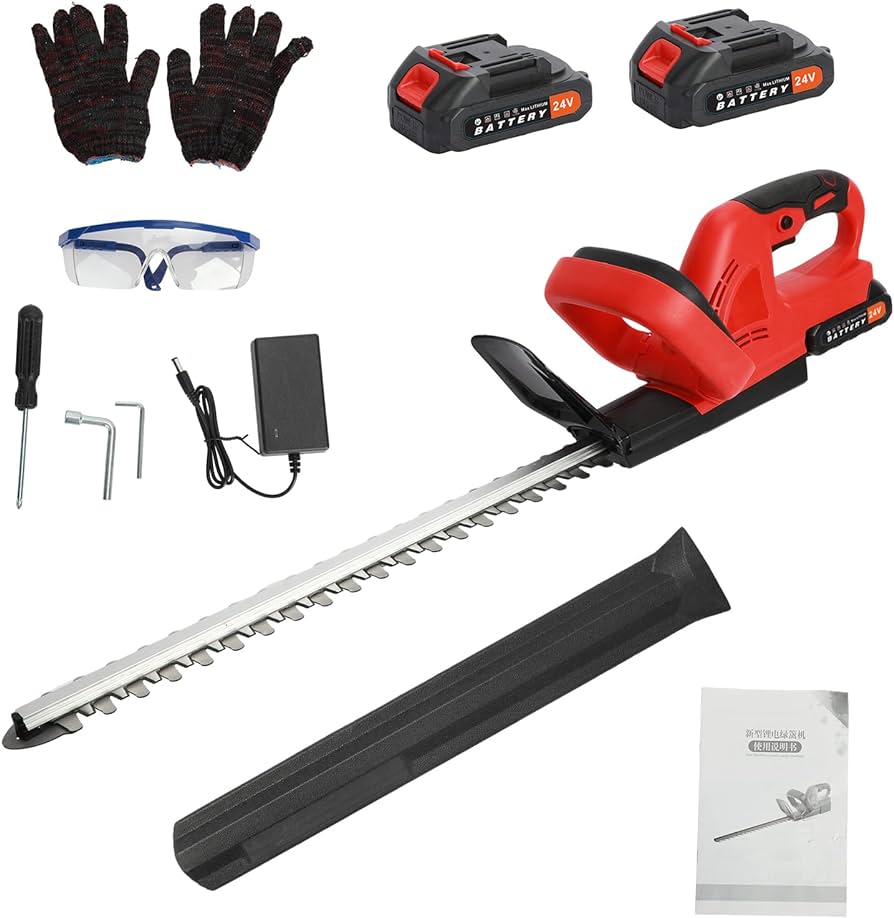
Tools Needed For Effective Sharpening
Selecting the appropriate tools is crucial to successfully sharpening the blades of your cordless hedge trimmer. The following tools will be needed:
| Tool | Description | Function |
|---|---|---|
| Flat File | A flat, metal file typically 4-6 inches long. | For removing burrs and rough edges along the flat of the blades. |
| Diamond File | A fine abrasive file ideal for sharpening. | For precision sharpening along the cutting edge of each tooth. |
| Steel Wool | Coarse steel fibers bunched together. | For cleaning and polishing the blade after sharpening. |
Technique For Consistent Sharpness
A methodical approach ensures even sharpness across all blades and teeth. For peak performance, employ the following sharpening technique:
- Inspect each blade tooth to determine the extent of the required sharpening.
- Stabilize the blade with a vise or by securing the trimmer on a flat surface to prevent movement.
- File each tooth individually using the diamond file, moving in one direction towards the tip of the blade.
- Maintain the angle of the original edge, typically between a 35 to 45-degree angle.
- Count your strokes to ensure consistent sharpening across all teeth—generally, 2 to 3 strokes are sufficient.
- Remove the burrs from the opposite side of the blade using the flat file, with a singular sweeping motion.
- Clean the blades with steel wool after sharpening to remove any metal filings and residue.
- Apply light machine oil to the blade to prevent rust and ensure smooth operation.
By following this guide and ensuring regular maintenance, your cordless hedge trimmer will remain sharp, effective, and ready to tackle the thickest of hedges with relative ease. Remember to handle your tools with care and follow manufacturer guidelines for specific maintenance recommendations.
Identifying Misalignment Issues
Ensuring that the blades and teeth of your cordless hedge trimmer are properly aligned is crucial for optimal performance. A misalignment can not only impede your gardening efforts but also shorten the tool’s lifespan. Being proactive about spotting and correcting alignment issues is a key step in maintaining your hedge trimmer. Follow these tips to identify and resolve any misalignment troubles swiftly and effectively.
Visual Inspection Tips
Regularly conducting a visual check of your trimmer’s blades can save you from future headaches. Look out for signs of uneven wear or damage such as:
- Nicked or bent teeth
- Gaps between the teeth where they do not come into contact
- Debris accumulation, which can also be a sign of uneven cutting
It is best to perform this inspection in a well-lit area to accurately assess the condition of the blades. Ensure the trimmer is switched off and the battery is removed before proceeding with the inspection to prevent accidents.
Performance Cues For Misalignment
While using your trimmer, be vigilant for performance cues that signal misalignment. These may include:
- Unusual vibrations during operation
- A tendency for the trimmer to pull to one side
- Inconsistent cutting results
- Increase in noise levels beyond the usual operating sounds
If you notice any of these symptoms, pause your work and perform a visual check to confirm if the blades require realignment or sharpening.
Regular Alignment Check Routine
Integrating a regular alignment check into your maintenance routine is vital for preserving the efficiency of your hedge trimmer. Aim to perform these steps:
| Frequency | Action |
|---|---|
| After Each Use | Conduct a quick visual inspection. |
| Bi-weekly or Monthly | Perform a more thorough check and cleaning. |
| Seasonally | Assess the need for professional servicing or blade replacement. |
By abiding by a set schedule, you will catch misalignment early and maintain the sharpness and alignment of your cordless hedge trimmer’s blades, ensuring longevity and effectiveness.

Credit: www.stihlshop.co.nz
Adjusting Trimmer Teeth
Adjusting Trimmer Teeth: Vigorous gardening sessions can render the teeth of your cordless hedge trimmer less effective than when they were brand new. To maintain the sharp, precise cutting you rely upon, adjusting the trimmer teeth is essential. This hierarchical adjustment not only ensures efficient operation but also prolongs the life of your hedge trimmer. Below are the steps to correctly adjust your trimmer’s teeth for optimal performance.
Necessary Tools For Realignment
Success in realignment starts with being fully equipped. The key tools you’ll need include:
- Work gloves: Safety first! Protect your hands during the adjustment process.
- Screwdriver: Most often required to remove the cover and adjust the blade.
- Rag: Keeping the area clean is crucial for a clear view and safe handling.
- Lubricant: A smooth adjustment may sometimes necessitate a lubricant for the teeth and gears.
- Manufacturer’s manual: For specific instructions related to your model.
Detailed Realignment Procedure
- Firstly, ensure your trimmer is turned off and the battery is removed to avoid any accidental startups. Safety should not be compromised.
- Consult the manual for guidance on accessing the teeth that require adjustment.
- If a cover is present, use the screwdriver to carefully remove it and reveal the mechanisms underneath.
- Inspect the teeth to identify which are misaligned. Typically, they should be uniformly spaced.
- Utilize the appropriate tool, often a simple screwdriver, to painstakingly adjust each tooth back to its original position.
- Gently clean off any debris and apply lubricant if necessary.
- Once all teeth appear uniform, reassemble any removed parts, ensuring everything is secure.
Testing For Proper Alignment After Adjustment
Post-adjustment, it’s crucial to confirm the effectiveness of your efforts:
- After reassembling, restore the battery power.
- Activate the trimmer and observe the movement of the blades. They should move smoothly and evenly.
- Carry out a “test trim” on some lesser visibility hedges or similar vegetation.
- Check for uniformity in the cuts, closeness, and ease of use.
- If any inconsistencies occur, it might be necessary to readjust and test again.
By regularly adjusting the teeth on your hedge trimmer, you maintain an invaluable tool in your gardening arsenal, ensuring a well-manicured garden with minimal effort.
Post-use Maintenance Rituals
Taking care of your cordless hedge trimmer after each use is essential for ensuring a long service life and optimal performance. Proper post-use maintenance rituals play a crucial role in keeping the blades sharp and the teeth of your trimmer in top condition. These simple yet effective practices will not only extend the lifespan of your tool but also help maintain its cutting efficiency for future trimming tasks.
Correct Cool-down Process
To maintain your cordless hedge trimmer, always begin with the correct cool-down process. Once you’ve completed your trimming task, don’t immediately pack away the tool. Instead, let it run for a minute at a no-load state to allow the air to circulate through the system, which helps in cooling down the motor and removing any debris caught in the blades.
Blade Oils And Storage Conditions
After cooling down your trimmer, it’s time to focus on the blades. Clean any sap or residue from the blades with a soft cloth. Then, apply a light coat of blade oil which prevents rust and ensures smooth operation. Use a specifically designed hedge trimmer blade oil or a light machine oil for the best results. For storage, always ensure a dry and moderate temperature environment. Moisture and extreme temperature fluctuations can cause damage, so keeping your tool in a shed, garage, or inside your home is advisable.
Protective Covers For Off-season Storage
During off-season storage, it’s imperative to use protective covers for your cordless hedge trimmer. A sturdy cover prevents dust accumulation and guards against accidental nicks or damage to the blades. It’s an easy step that makes a significant difference, providing a layer of protection to ensure your trimmer is ready and safe for use when the trimming season returns.
Tips For Long-term Blade Preservation
Keeping a cordless hedge trimmer’s blades sharp and efficient is critical for effortless trimming and landscaping. With proper maintenance, these tools can last for years without losing their performance edge. Below are expert tips on ensuring long-term blade preservation for cordless hedge trimmers.
Periodic inspections and tune-upsPeriodic Inspections And Tune-ups
Regular check-ups are essential to maintaining the sharpness and integrity of hedge trimmer blades. Inspect blades after each use for damage or wear. If signs of dullness are noticeable, it’s time for a tune-up. Use a fine file or whetstone to sharpen the cutting edges carefully, following the blade’s original angle. Apply light machine oil to the blades to prevent rust and ensure smooth operation.
- Inspect blades for nicks, debris, and sap build-up.
- Follow the manufacturer’s guidelines for sharpening procedures.
- Apply a light coating of oil post-tune-up for protection.
Managing Battery Life For Cordless Trimmers
Battery maintenance is as important as blade care to ensure your cordless trimmer’s longevity. Keep batteries charged but avoid overcharging, which can reduce their lifespan. Optimize battery usage by planning your trimming work: fully charge before large tasks and recharge when the battery is low. Store batteries in a cool, dry place away from extreme temperatures to prevent degradation.
| Do’s | Don’ts |
|---|---|
| Charge fully before extensive use. | Overcharge the battery. |
| Use until low, then recharge. | Leave the battery in extreme temperatures. |
| Store in a cool, dry place. | Ignore warning signs of battery wear. |
Handling And Storage Best Practices
Proper handling and storage are as crucial as maintenance tasks. Always transport and store the trimmer with a blade cover in place to protect the teeth from accidental knocks. Hang the tool on a wall mount or store it horizontally on a shelf to avoid blade deformation. Keep in a dry, secured place out of reach of children and pets. Clean the trimmer after each use to prevent build-up of debris that can dull the blades over time.
- Secure blade cover before storing the trimmer.
- Keep the tool in a horizontal position to prevent bending.
- Store in a dry, secured location.
- Clean thoroughly after each use.
Frequently Asked Questions For Tips For Maintaining The Blades And Teeth Of Cordless Hedge Trimmers
How Often Should I Sharpen Hedge Trimmer Blades?
Regular sharpening maintains optimal performance. Sharpen after about 50 hours of use or once per season, whichever comes first.
Can I Sharpen My Hedge Trimmer Blades At Home?
Yes, with the correct tools like a flat file or a power grinder, you can carefully sharpen the blades at home following the manufacturer’s guidelines.
What Oil Is Best For Hedge Trimmer Blades?
Use a light machine oil or a specific hedge trimmer blade oil. Apply it before and after use to keep the blades lubricated and protect against rust.
How Do I Replace Damaged Hedge Trimmer Teeth?
Consult your user manual for specific instructions on replacing teeth. Generally, purchase the correct replacement set and follow the provided step-by-step process.
Conclusion
Maintaining your cordless hedge trimmer ensures long-lasting performance. Regular cleaning, sharpening, and proper storage are vital. Adhere to these tips, and your hedge trimmer will thank you with every neat snip. Remember, a well-cared-for tool is a durable, effective garden ally.
Now get trimming with confidence!