To properly calibrate a cordless drill for precise drilling in various materials, follow these steps: adjust the clutch setting, choose the appropriate drill bit, secure the workpiece, and maintain a consistent drilling speed and pressure. Calibrating a cordless drill ensures accurate and controlled drilling, preventing damage to materials and producing clean and precise holes.
Proper calibration allows the drill to be versatile and effective in different tasks, from drilling into wood to metal or masonry. By adhering to these steps, you can optimize the performance of your cordless drill and achieve accurate and professional results in various material types.
Importance Of Calibrating Your Cordless Drill
Calibrating your cordless drill is essential for achieving precise drilling outcomes and preventing damage to materials and components. A calibrated drill ensures that the drilling depth and speed are accurately set, allowing for precise and clean holes in various materials.
When drilling into different materials such as wood, metal, or concrete, each requires specific drilling techniques and settings. By calibrating your drill, you can optimize the drilling parameters based on the material being drilled, resulting in improved drilling performance, reduced material damage, and enhanced safety.
Calibrating your cordless drill involves adjusting the torque settings, speed control, and depth control to match the requirements of the task at hand. This calibration process allows you to tailor the drill’s performance to the specific material and helps minimize the risk of over-drilling or under-drilling.
In summary, taking the time to properly calibrate your cordless drill is crucial for achieving precise drilling outcomes and safeguarding the integrity of the materials you are working with.
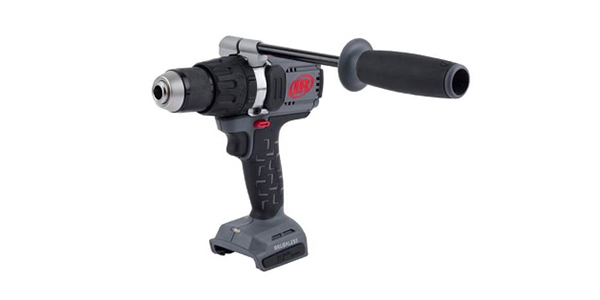
Understanding Your Cordless Drill
A cordless drill is a versatile tool that can be used for various drilling tasks. To properly calibrate your cordless drill for precise drilling in different materials, it is important to understand its components and their functions.
| Component | Function |
|---|---|
| Battery | Provides power to the drill |
| Chuck | Holds the drill bit securely |
| Trigger | Controls the speed of the drill |
| Torque setting | Adjusts the amount of force applied to the drill |
Understanding the common features and settings of your cordless drill is essential for calibrating it properly. Most drills have adjustable speed settings, allowing you to control the drilling speed based on the material being drilled. Additionally, drills often come with a torque setting that determines the amount of force applied to the drill bit, which can be adjusted based on the hardness of the material.
By understanding these components and settings, you can optimize your cordless drill for precise drilling in various materials, ensuring efficient and accurate results.
Tools And Materials You’ll Need
To properly calibrate a cordless drill for precise drilling in various materials, there are a few tools and materials you’ll need:
| A set of drill bits |
| Adjustable wrench |
| Screwdriver |
| Calibrating jig or block |
| Clamp |
These tools will help you adjust the drill to ensure accurate and precise drilling. Begin by selecting the appropriate drill bit for the material you will be drilling into. Use the adjustable wrench to loosen or tighten the drill chuck, depending on the size of the drill bit. Insert the drill bit into the chuck, making sure it is securely tightened. If necessary, use a screwdriver or calibrating jig to fine-tune the drill’s torque settings. A clamp can be used to secure the material being drilled, providing stability for more precise drilling. Remember to always follow the manufacturer’s instructions when calibrating and using your cordless drill.
Pre-calibration Preparation
When it comes to calibrating a cordless drill for precise drilling in various materials, there are a few important steps you should follow. The first step is to ensure appropriate safety measures are in place. This includes wearing protective eyewear, gloves, and a dust mask, as well as working in a well-ventilated area. Before calibrating the drill, make sure to clean and inspect it. Remove any dust, dirt, or debris from the exterior and check for any loose or damaged parts. It’s also important to make sure the drill is fully charged and the battery is properly inserted. By taking these precautions, you can ensure a safe and effective calibration process.
Adjusting The Clutch Setting
Adjusting the clutch setting on your cordless drill is crucial for precise drilling in various materials. Understanding clutch settings is the first step. The clutch is a mechanism that controls the drill’s torque or twisting power. It allows you to adjust the drill’s power based on the material you are drilling into, preventing damage or overdriving.
To determine the required clutch setting for your project, consider the material’s hardness and thickness. For softer materials like wood, a lower setting is suitable to prevent overdriving. In contrast, harder materials like metal or concrete require a higher clutch setting for efficient drilling. It’s advisable to test different settings on a scrap piece of material before starting your project to ensure the proper clutch setting.
Properly calibrating your cordless drill’s clutch helps achieve accurate and consistent drilling results. By following these guidelines, you can optimize your drilling experience across various materials, enhancing the efficiency and precision of your projects.
Calibrating The Depth Control
Calibrating the depth control of a cordless drill is crucial for achieving precise drilling in various materials. The accurate depth control allows you to control the drilling depth, ensuring that you neither drill too shallow nor too deep into the material.
Proper calibration of the depth control involves adjusting it to the desired drilling depth. This can be done by loosening the depth control collar and sliding it up or down to the desired position. Once set, tighten the collar to secure the depth setting.
Accurate depth control is important as it helps prevent damage to the material being drilled. It ensures that holes are drilled to the exact depth required, whether for installing screws, creating dowel joints, or other woodworking tasks.
By calibrating the depth control, you can achieve precise and consistent drilling results in various materials, such as wood, metal, or plastic. This enhances the efficiency and effectiveness of your drilling operations, reducing the chances of mistakes or accidents.
Aligning The Drilling Angle
Properly calibrating a cordless drill is essential for achieving precise drilling in various materials. One important aspect of calibration is aligning the drilling angle. To align the drill at the desired angle, several factors need to be considered. Firstly, the type of material being drilled plays a crucial role in determining the drilling angle. Different materials require different drilling angles for optimal results. Secondly, the drill bit being used also affects the drilling angle. The size and type of the drill bit can affect the angle at which the drill penetrates the material. Finally, the user’s technique and control over the drill influence the drilling angle. It is important to maintain a steady hand and apply consistent pressure to ensure accurate drilling.
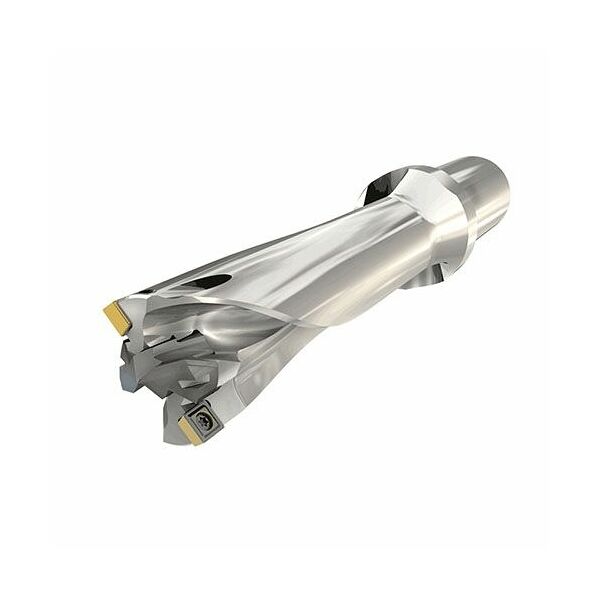
Credit: www.hoffmann-group.com
Checking The Chuck Alignment
One crucial step in properly calibrating a cordless drill for precise drilling in various materials is checking the chuck alignment. This is important as misalignment issues can lead to inaccurate drilling and potential damage to the material being worked on. To identify misalignment issues, you can start by visually inspecting the alignment of the chuck with the drill’s body. Look for any visible gaps or misalignments between the chuck and the body. If you notice any misalignment, it is essential to take the necessary steps to adjust the chuck for proper alignment.
Verifying The Chuck Tightness
Determining the right amount of tightness is crucial to ensure precise drilling with a cordless drill. Avoiding slippage during drilling is essential for accurate results. To calibrate the chuck tightness, follow these steps:
- Ensure the drill is switched off and unplugged.
- Insert the appropriate drill bit into the chuck.
- Hold the drill bit firmly with one hand while using the other hand to grasp the chuck.
- Rotate the chuck clockwise to tighten it.
- Avoid overtightening, as it may cause damage to the drill bit or the chuck.
- Conversely, inadequate tightness can result in slippage during drilling.
- To test the chuck tightness, firmly hold the drill bit and try to rotate the chuck counterclockwise.
- If there is any movement or slippage, tighten the chuck a little more until no rotation is possible.
By verifying and adjusting the chuck tightness, you can ensure accurate and precise drilling in various materials.
Testing And Fine-tuning
Testing and fine-tuning the calibration of a cordless drill is crucial for achieving precise drilling results in various materials. Start by testing the drill on a scrap piece of material similar to the one you will be working on. This will allow you to assess the drill’s performance and make any necessary adjustments.
When testing the drill, pay attention to the speed, torque, and stability. Ensure that the drill is operating smoothly and that there is no wobbling or excessive vibration. If the drill is not drilling straight or causing damage to the material, adjustments need to be made.
To make further adjustments, refer to the drill’s user manual for specific instructions. Some drills may have adjustable settings for speed and torque, while others may require you to change the drill bit or adjust the clutch. Take your time to understand the drill’s features and how they affect drilling precision.
Remember to always wear appropriate safety gear, such as safety glasses and gloves, when calibrating and using a cordless drill. This will ensure your safety and enhance the accuracy of your drilling.
Maintenance And Regular Calibration
Regular calibration and maintenance are essential for ensuring the optimal performance of a cordless drill and achieving precise drilling in various materials. Calibration involves adjusting the drill’s settings to match the specific requirements of different materials, such as wood, metal, or concrete.
The importance of regular calibration cannot be overstated. Not only does it enhance the accuracy of the drill, but it also prolongs its lifespan and prevents unnecessary wear and tear.
To maintain a calibrated drill, it is important to follow some tips. First and foremost, always keep the drill clean and free from debris. Regularly inspect and replace worn-out or damaged drill bits. Lubricate the moving parts regularly to prevent rusting. Store the drill in a dry and secure place when not in use. Finally, consider scheduling regular professional maintenance to ensure the drill’s continued accuracy and performance.
Troubleshooting Common Calibration Issues
In order to properly calibrate a cordless drill for precise drilling in various materials, it is important to troubleshoot common calibration issues. One common issue is drill bit slipping during drilling. This can be caused by a variety of factors, including a worn or dull drill bit, insufficient pressure applied during drilling, or an improperly adjusted chuck. To address this issue, ensure that you are using a sharp and appropriate drill bit for the material you are drilling into. Apply sufficient pressure while drilling to maintain control and prevent slipping. Additionally, check the chuck tightness and adjust if necessary to securely hold the drill bit in place.
Inconsistent depth control is another common calibration issue that can affect drilling accuracy. This can be caused by a misaligned depth stop, improper drill speed, or incorrect drill bit selection. To troubleshoot this issue, ensure that the depth stop is properly aligned and adjusted to the desired drilling depth. Use the correct drill speed for the material being drilled to prevent excessive friction and heat buildup. Finally, select a drill bit that matches the desired hole size to ensure consistent depth control.
Frequently Asked Questions On How To Properly Calibrate A Cordless Drill For Precise Drilling In Various Materials?
How Do I Calibrate A Cordless Drill For Precise Drilling?
To calibrate a cordless drill for precise drilling, start by adjusting the clutch setting based on the material you’re working with. Use a drill bit suitable for the task at hand and set the speed accordingly. Hold the drill at a 90-degree angle to ensure accurate drilling and maintain a steady hand throughout the process.
What Are The Benefits Of Calibrating A Cordless Drill?
Calibrating a cordless drill offers several benefits. It improves drilling precision, reduces the risk of damage to the workpiece, and enhances productivity. By setting the drill correctly, you prevent the bit from getting stuck or breaking, ensuring better results. Additionally, calibrated drills make working with different materials easier, leading to efficient and accurate drilling.
How Often Should I Calibrate My Cordless Drill?
It is recommended to calibrate your cordless drill whenever you switch to a different material, drill bit, or project that requires precise drilling. Regular calibration ensures optimal performance and prevents unnecessary damage. Get into the habit of checking and adjusting your drill’s settings before each new task to maintain accuracy and achieve the best results.
Conclusion
By properly calibrating your cordless drill, you can achieve precise drilling results in a variety of materials. From wood to metal, understanding how to adjust the drill’s settings ensures that you can work with precision and efficiency. Remember to select the appropriate drill bit for each material and adjust the speed and torque settings accordingly.
With this knowledge, you can confidently tackle any drilling project with ease.